uptime

uptime
DARLING~使用worker转发跳转替换路径,现在应该差不多完美了
感谢佬:【Cloudflare教程系列】利用Worker反代github 60 提供的思路
uptime-kuma 151是一个优雅网站在线状态监控面板工具,我认为它也可以是你的域名集合站,避免在新设备上访问时还需要麻烦的寻找收藏的域名。
之前有佬分享了docker部署的教程:【好玩的 Docker 项目】搭建一个高颜值的网站和服务在线状态跟踪工具——“uptime-kuma” 165
但是我觉得不稳,毕竟所有服务都部署在自己的服务器上,面板都挂了还监控个锤子啊(
然后我就想着用Vercel railway worker之类的服务部署,但是要么限制额度要么没数据库,最后是选择了huggingface space构筑,感谢大佬分享的教程:自建免费的网站监控服务-在huggingface上部署uptime kuma - luckzack - 博客园 147
部署面板
默认你有hugging face账号,下面是我步骤:
创建一个新空间:Create a new Space 92
- Space name: uptime-kuma
- License: MIT
- Select the Space SDK: docker (Blank)
- Space hardware: free
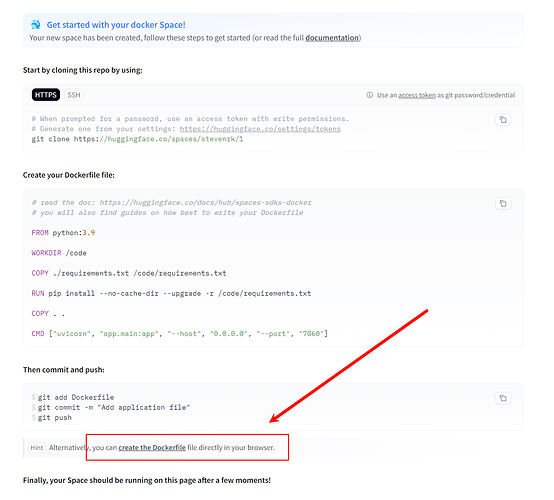
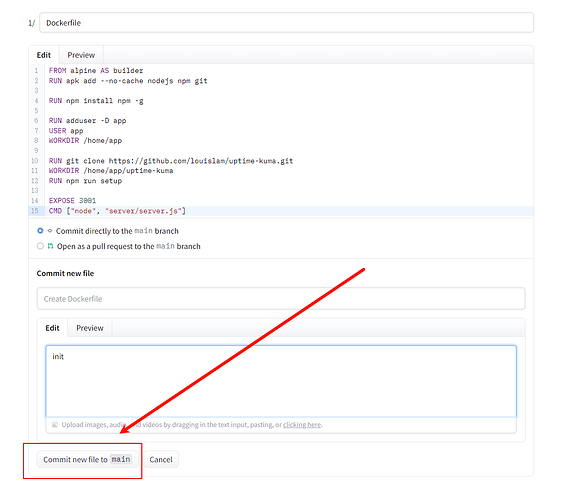
编辑Dockerfile :
image1100×991 79.1 KB
输入以下内容:
1 | FROM alpine AS builder |
提交修改:
image1129×980 44.3 KB
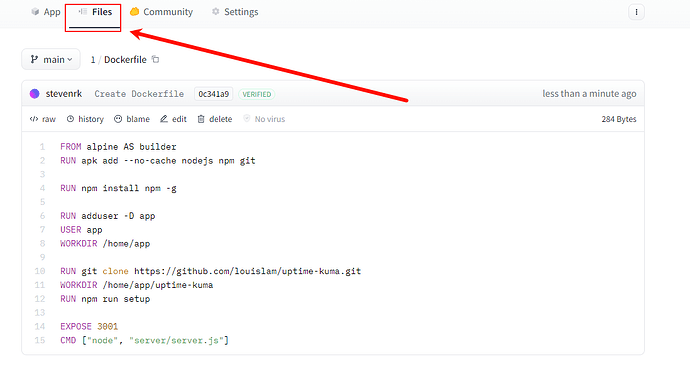
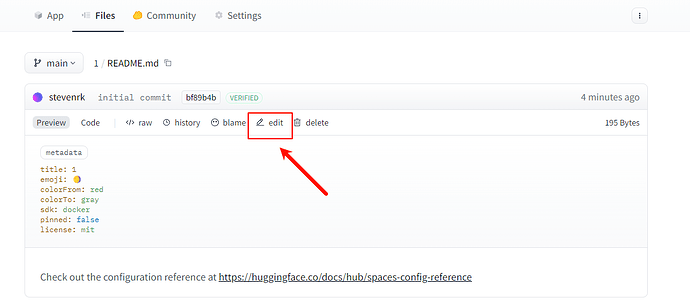
不需要等待完成,去files里编辑README文件:
image1098×622 34.7 KB
image1063×336 31.1 KB
image1098×486 33.2 KB
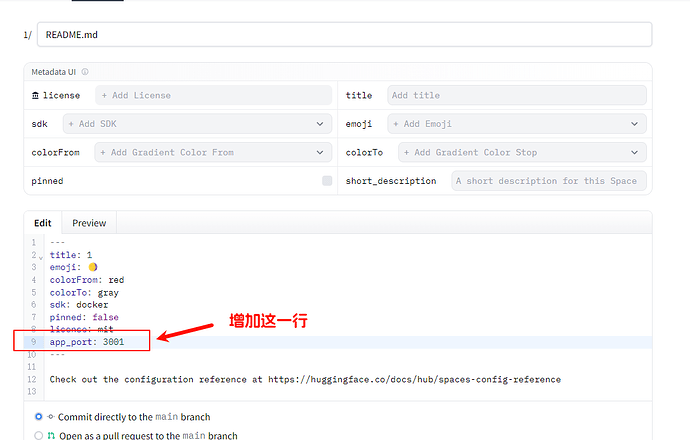
增加一行 :
1
app_port: 3001
,然后提交Commit
image1088×694 33.1 KB
验证成功OR失败
观察你的页面上有没有以下图标之一:
6——祝贺你,成功了!
——等一会,稍安勿躁,还没部署完!不行的话,看看你的
readme.md填写对了吗?
No application file——dockerfile忘记保存了吧?
Build error或 Runtime error——出错了,检查dockerfile是否多了回车!
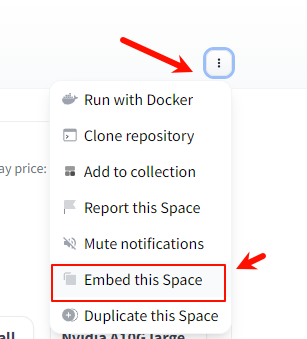
build完成后你就能获取到访问链接,点击Embed this Space
记得第一时间访问去注册管理员账号
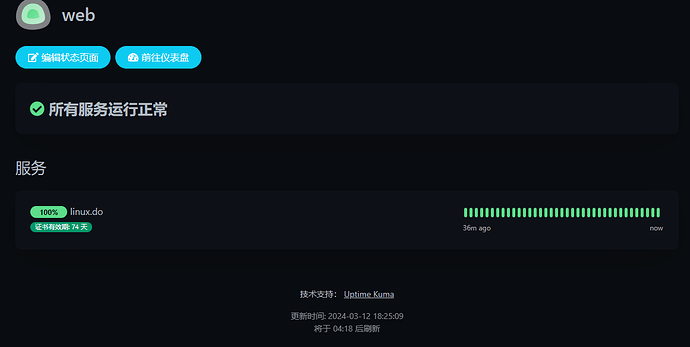
监控面板中创建一个状态页面,后缀/status/web,于是就得了一个域名
https://xxx.hf.space/status/web 27
image1161×585 18.4 KB
域名跳转
然后我觉得这个域名难看又难记,想用自定义域名访问,可惜hugging face没有开通这个业务,前年就有人提了。
参考佬的思路,用worker转发,并且我把路径也做了替换,如果想直接指向面板根路径的话,就将可选区域去除,或者根据你的需求调整路径:
- 进入cloudflare 的 Workers 和 Pages 36
- 创建应用程序,编辑代码,然后 保存并部署:
1 | export default { |
回到cloudflare的网站,选择你的域名,增加一个DNS解析,我是用子域名,所以是A记录,IP就从优选里挑一个:
https://stock.hostmonit.com/CloudFlareYes 68
image1101×44 1.88 KB
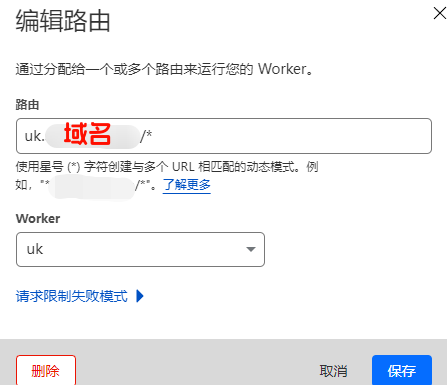
然后添加一个 Workers 路由, 点击保存
去浏览器试试

 6
6
